You may have been directed by us or your hosting provider to update your incoming and outgoing email server settings. This guide walks you through how to do this in Outlook on Windows for an existing account that has already been added to Outlook.
Guide
Step 1. Open Outlook and click "File" in the top left corner:

Step 2. Ensure that the dropdown shows the correct email account (e.g. [email protected]). If not, click on the first dropdown showing the wrong email account and select the correct email account.
Step 3. Click on the "Account Settings" and then select "Server Settings" from this dropdown:

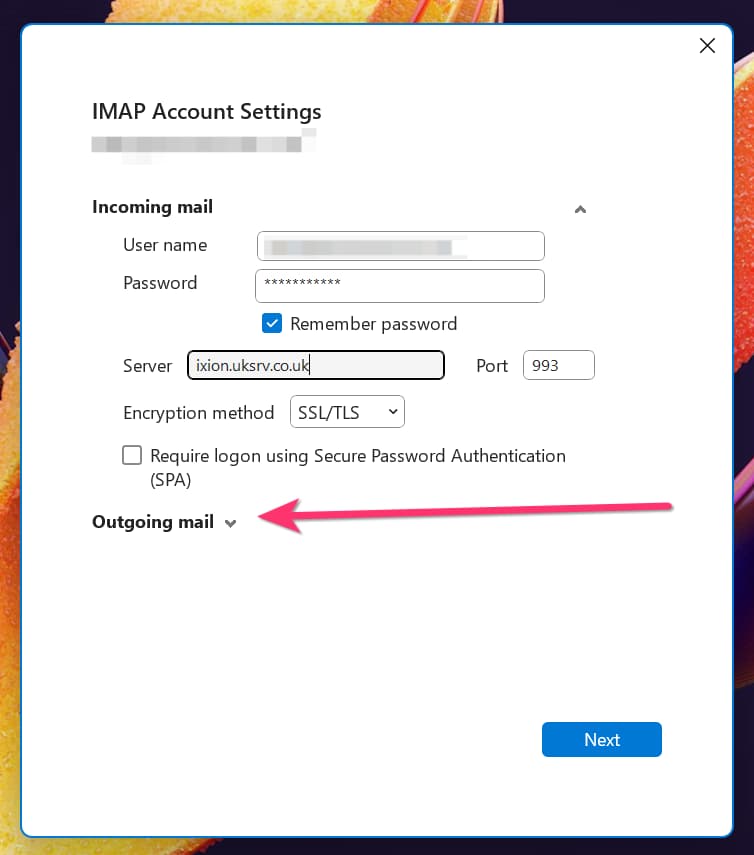
Step 4. By default, the "Incoming mail" information should be displayed. This is where you update the server hostname for the incoming email server:

Step 5. You now need to update the outgoing mail server. To open this information, click on the "Outgoing mail" link:
Step 6. You can now update the outgoing mail server hostname in this field:

Step 7. Click "Next" to save the settings.
If you have any issues, open a new ticket here.
